
Wondering how to save Excel as PDF in landscape? Try these awesome techniques to quickly save your spreadsheet as a PDF file.
Microsoft Excel is a renowned application for storing, visualizing, and analyzing data. People all over the world use it to create databases for various purposes. However, when it comes to sharing the data stored in an Excel file and maintaining the data integrity, people often take resort to PDF files.
The reason is PDF retains the original data formatting and can be opened on any device without any compatibility issues. The default page orientation of Excel files is portrait, and hence, when you want to save that file in PDF format, it gets saved in portrait style.
To save it in PDF in landscape, you need to follow certain techniques. Here, I’ll share some easy methods to save Excel as PDF in landscape.
Let’s explore below multiple ways to save Excel as PDF in landscape on the Excel PC desktop app and Excel on the web app.
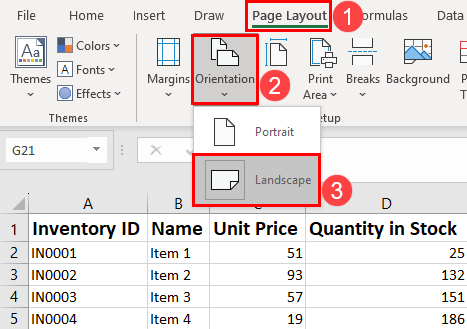
You can use the Page Layout tab on the Excel ribbon menu and the Print command ( Ctrl + P )to convert an Excel file into a PDF in a landscape layout.
This is the most common method that you can try irrespective of your Excel skill level.
Firstly, you must change the layout of the Excel worksheet by following these steps:
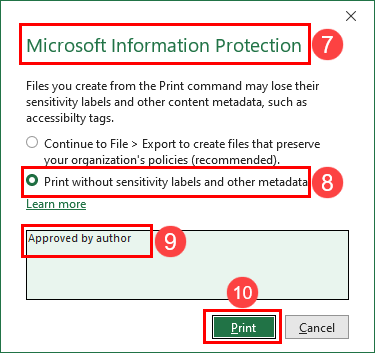
Now, learn below the steps to save the Excel file as PDF:
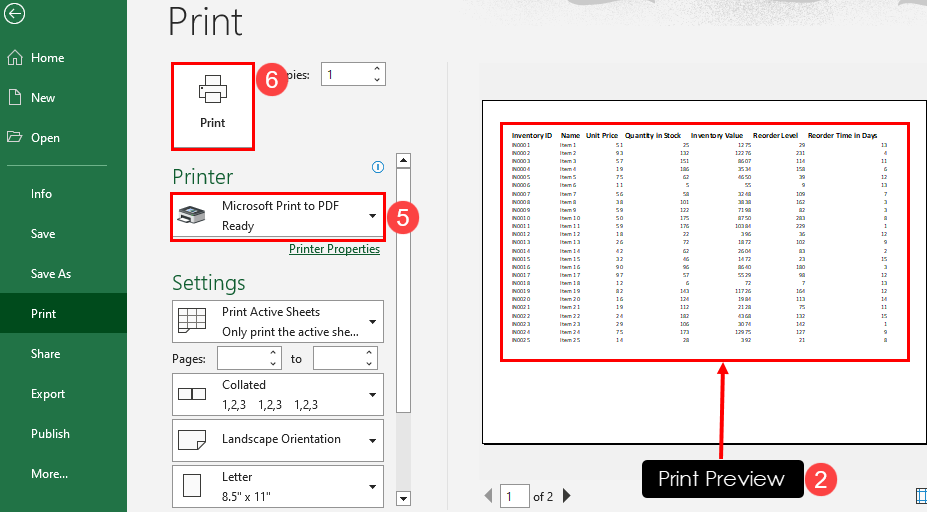
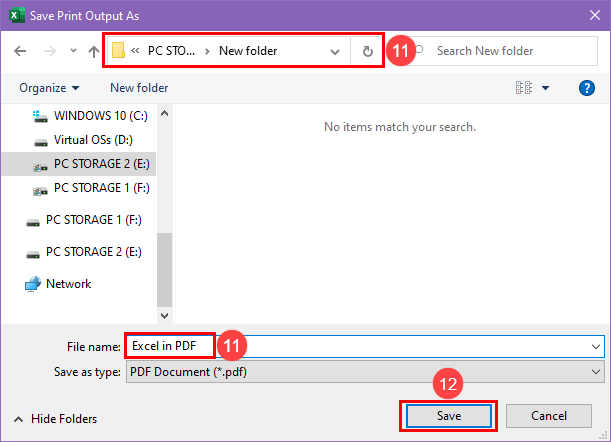
Head over to the directory where you saved the PDF file. Double-click the saved file to see it in landscape layout in PDF.
When choosing a printer in Step 5 of the above process, you might see other PDF printing tools like Foxit PDF, Adobe Acrobat, etc.
That’s because you’ve got these apps on your PC. These PDF applications automatically integrate with Microsoft Excel so that you can print PDFs from Excel easily.
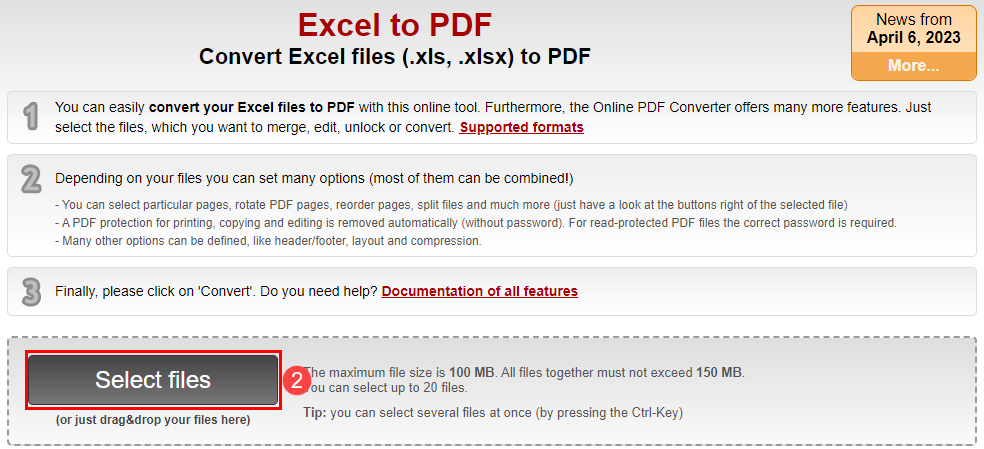
If you’re okay uploading your Excel file to a third-party server, you can try this method too. Here, you can use various online portals that offer free or paid Excel to PDF file conversion services.
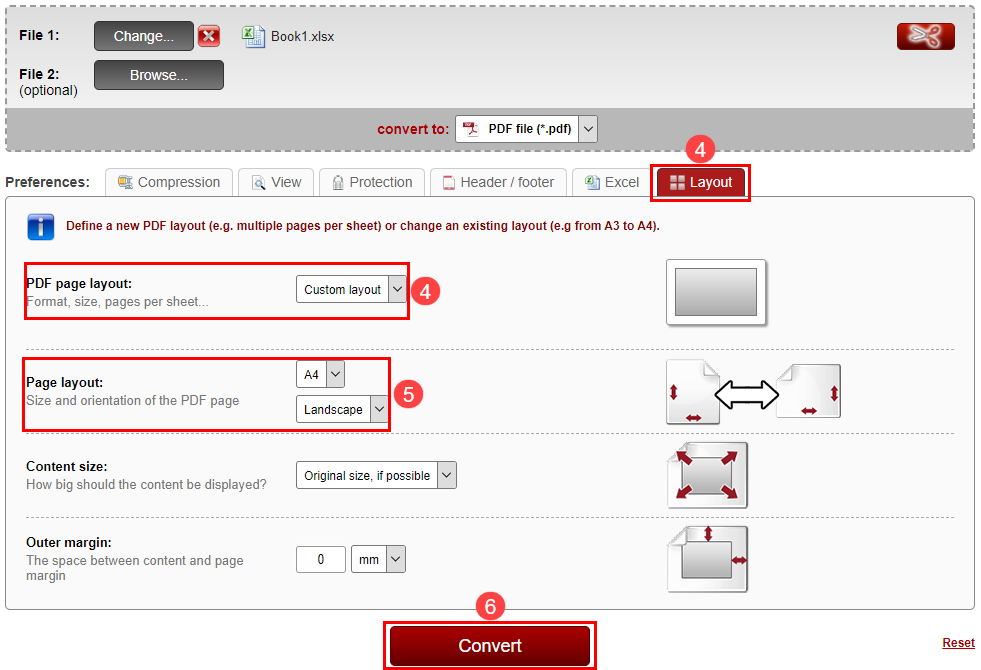
Most of these web apps also let you change the PDF orientation to landscape. Find below the steps you can follow if you’re using Convert Excel to PDF by Adobe:
📝 Note: Use any third-party websites to convert files at your own discretion. Go through the data privacy and security policy of the website or web app before uploading any confidential Excel file to third-party servers. If you’re satisfied with the privacy statement of the website, you can proceed at your own risk.
Do you love to automate data analytics and visualization tasks on Excel using Excel VBA scripts? Are you looking for a one-click method to save Excel files as PDFs in landscape? Then, you’ll also like this method.
Here, you’ll find a VBA script to automate the conversion process of Excel worksheets to landscape from portrait automatically.
The process is effective on all the worksheets of your workbook. Furthermore, the Excel VBA code will convert all the worksheets to separate PDF files. Finally, the code will switch the worksheets back to portrait mode.
Find below the code and related steps to use this code on your Excel desktop app:
Sub ConvertWorksheetsToLandscapeAndSaveAsPDF() Dim wb As Workbook Dim ws As Worksheet Dim filePath As String Dim fileName As String ' Set the file path where PDF files will be saved filePath = "D:\" ' Set the file name (you can modify it as needed) fileName = "WorksheetPDF" ' Disable screen updating for faster execution Application.ScreenUpdating = False ' Set a reference to the workbook Set wb = ThisWorkbook ' Loop through each worksheet in the workbook For Each ws In wb.Worksheets ' Change the orientation to landscape ws.PageSetup.Orientation = xlLandscape ' Create the file name for the PDF file fileName = fileName & "_" & ws.Name & ".pdf" ' Save the worksheet as PDF ws.ExportAsFixedFormat Type:=xlTypePDF, fileName:=filePath & fileName, Quality:=xlQualityStandard, _ IncludeDocProperties:=True, IgnorePrintAreas:=False ' Restore the original orientation to portrait (optional) ws.PageSetup.Orientation = xlPortrait ' Reset the file name fileName = "WorksheetPDF" Next ws ' Enable screen updating Application.ScreenUpdating = True ' Display a message when the process is complete MsgBox "PDF files have been saved in the specified folder.", vbInformation End Sub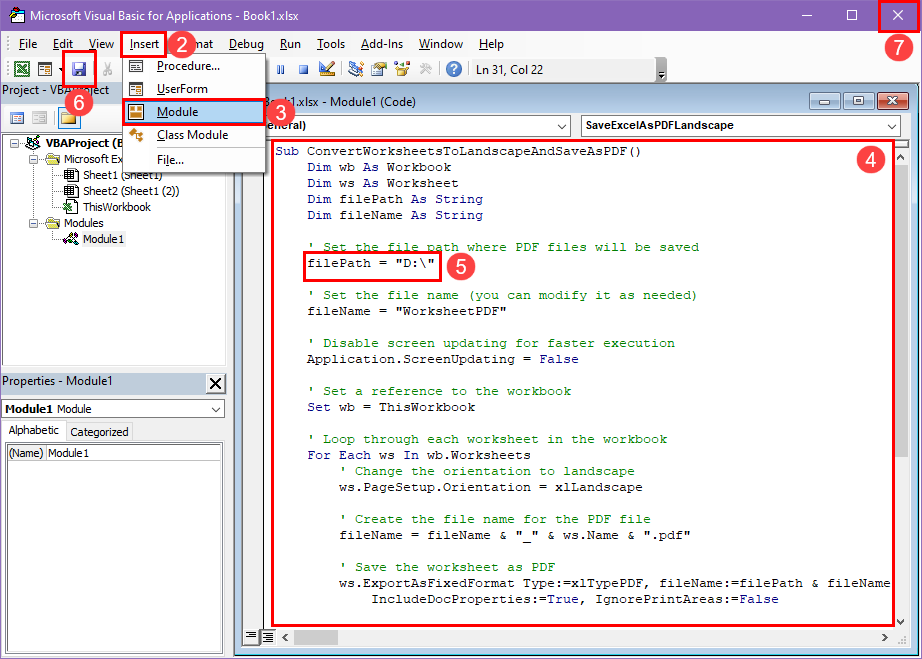
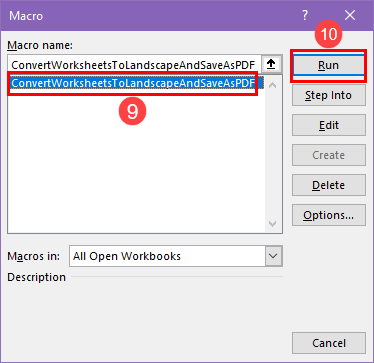
The Excel VBA macro will perform all the tasks mentioned previously and show a confirmation dialog box. Now, go to the directory or drive that you entered in the above code to find individual PDF files of all the worksheets in the landscape layout.
This method is specifically useful if you need to save Excel as PDF in landscape for hundreds of worksheets on your workbook.
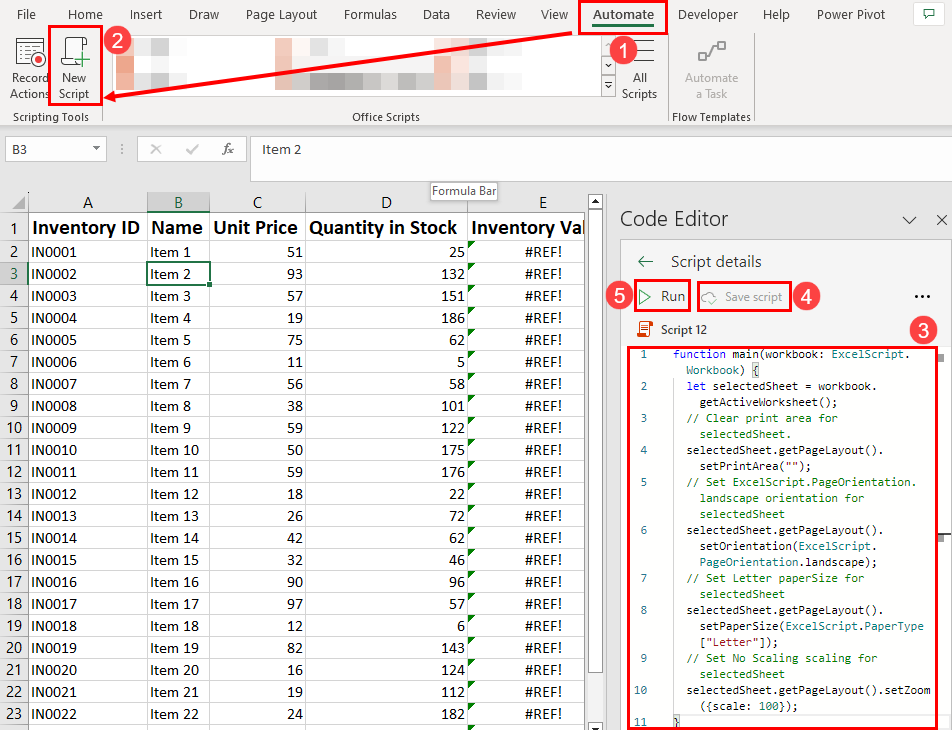
If you wish to automate this task on Excel on the web app or an Excel desktop app that has Office Scripts, you should try this method.
You’ll only find this feature on your Excel copy if you possess Microsoft 365 Business Standard or a higher subscription. If you do, let’s get started with the steps below:
function main(workbook: ExcelScript.Workbook) < let selectedSheet = workbook.getActiveWorksheet(); // Clear print area for selectedSheet. selectedSheet.getPageLayout().setPrintArea(""); // Set ExcelScript.PageOrientation.landscape orientation for selectedSheet selectedSheet.getPageLayout().setOrientation(ExcelScript.PageOrientation.landscape); // Set Letter paperSize for selectedSheet selectedSheet.getPageLayout().setPaperSize(ExcelScript.PaperType["Letter"]); // Set No Scaling scaling for selectedSheet selectedSheet.getPageLayout().setZoom(); >
Excel Automate will convert the currently selected worksheet to the landscape layout. If you need to convert all the worksheets in the workbook to landscape, select each worksheet and run the above code separately on all the worksheets.
Microsoft is yet to add the Save or Save As functionality via scripting in Office Scripts. For the time being, you need to manually convert Excel to PDF by following these steps:


Despite being a wonderful file format for data storage and data analysis, Excel isn’t the best option for printing and sharing. Hence, you might need to save Excel as PDF in landscape on different occasions.
Now that you know how to save Excel as PDF in landscape using some effective methods, you should be able to do so without facing any difficulty. Got any questions about these approaches? Tell us in the comments.
As an Excel enthusiast, you may also like to read about showing status bar in Excel and how to concatenate dates In Excel.